My early attempts at dill pickles were not very successful. I followed the FDA guidelines from the Ball Blue Book of Preserving
Enter my neighbor Betty. Betty and I have swapped a lot of produce and recipes over the years (she’s also my son’s piano teacher and has become like a grandmother to him ![]() ). Betty makes a simple old-fashioned brined dill pickle that doesn’t require canning, and couldn’t be easier to make.
). Betty makes a simple old-fashioned brined dill pickle that doesn’t require canning, and couldn’t be easier to make.
Betty’s No Canning Required Dill Pickles
Ingredients
- 9 cups water
- 1 ½ cup vinegar
- 1/3 cup salt (Do not use salt with iodine, it will give the pickles a brown tint, Real Salt also gives a slight brown tint, canning salt works best)
- ½ cup sugar
- Dill, 2-3 stalks
- 2-4 inch long cucumbers, enough to fill a gallon jar
Directions
Combine the water, vinegar, salt and sugar and boil one minute. Cool slightly. I used Real Salt for this batch, and it made my brine darker than normal.
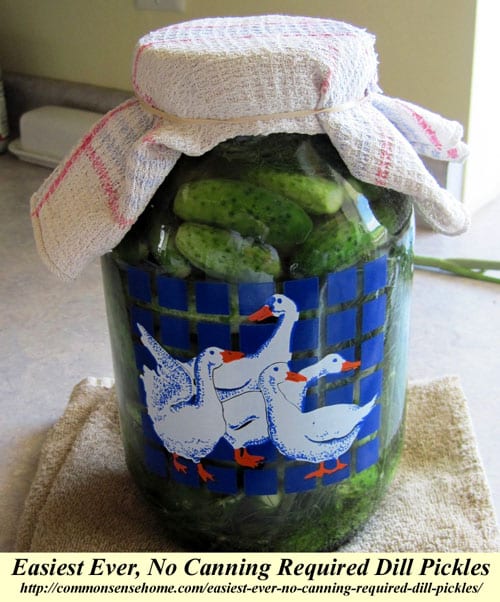
Wash the cucumbers and cut off about 1/16”from each end. This gets rid of some enzymes that would soften the pickles, and allows better penetration of the brine. Pack the cucumbers in a one gallon jar with the dill.
Note: I like to curl up some of the dill in the top of the jar to pin down the cucumbers and make sure they all stay submerged in the brine.
Pour the warm brine over the cucumbers. Let stand, loosely covered, at room temperature for three days. (Drape a towel over the jar opening or let lid sit on loosely.) I rubber band everything, especially in fruit fly season. You could also use something like the Picklemeister Glass Fermentor Jar, which in addition to being fun to say, comes with its own airlock built right into the lid.
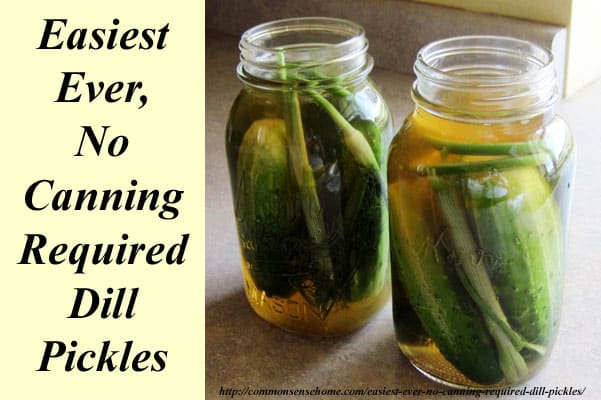
I had some extra brine and cucumbers, so I made up a couple of quart jars and added a garlic scape to each jar. (Top photo in post.)
Cover and store in refrigerator. They are ready to eat after the three days but the flavor improves after a week or two in the refrigerator.
That’s it! No canning, no heat processing of any sort. These pickles stay fresh and crisp tasty for months. We’ve enjoyed them at Christmastime. If you don’t have a lot of small cucumbers, you could cut the recipe in half, or make up a full batch of brine but process pickles by the quart and hold the reserve brine in the fridge for a couple of weeks. Delicious! Thanks, Betty. I love my country neighbors!


- 9 cups water
- 1 ½ cup vinegar
- 1/3 cup canning salt
- ½ cup sugar
- Dill, 2-3 stalks
- 2-4 inch long cucumbers, enough to fill a gallon jar
- Combine the water, vinegar, salt and sugar and boil one minute. Cool slightly.
- Wash the cucumbers and cut off about 1/16”from each end. This gets rid of some enzymes that would soften the pickles, and allows better penetration of the brine. Pack the cucumbers in a one gallon jar with the dill.
- Pour the warm brine over the cucumbers. Let stand, loosely covered, at room temperature for three days. (Drape a towel over the jar opening or let lid sit on loosely.) I rubber band everything, especially in fruit fly season.
- Cover and store in refrigerator. They are ready to eat after the three days but the flavor improves after a week or two in the refrigerator.
- I like to curl up some of the dill in the top of the jar to pin down the cucumbers and make sure they all stay submerged in the brine.
Your amazon.com purchase through this site earns me an affiliate payment at no extra cost to you.
Thank you for supporting the site.
The post Easiest Ever, No Canning Required Dill Pickles appeared first on Common Sense Homesteading.


